Testing server side rendered (SSR) React with Cypress
Cypress is a fully integrated testing suite for doing integration tests on your web application. it comes with pre-installed browsers and a runtime to be able to get started super fast.
Check it out at https://www.cypress.io/
Project Setup
All that code can be found here in its final state https://github.com/simonireilly/cypress-ssr/
Let's begin by creating an example next app using the create-next-app command and node package manager.
NextJS https://github.com/zeit/next.js/ is a server side rendering javascript framework which can be used with react in order to generate server side rendered pages which have client-side interactions.
npx create-next-app cypress-ssrNext we're going to add all our testing depencies using yarn.
cd cypress-ssr
yarn add cypress
Unlike other testing frameworks where you might be required to include certain libraries and separate runtimes for browsers, with cypress everything is include!
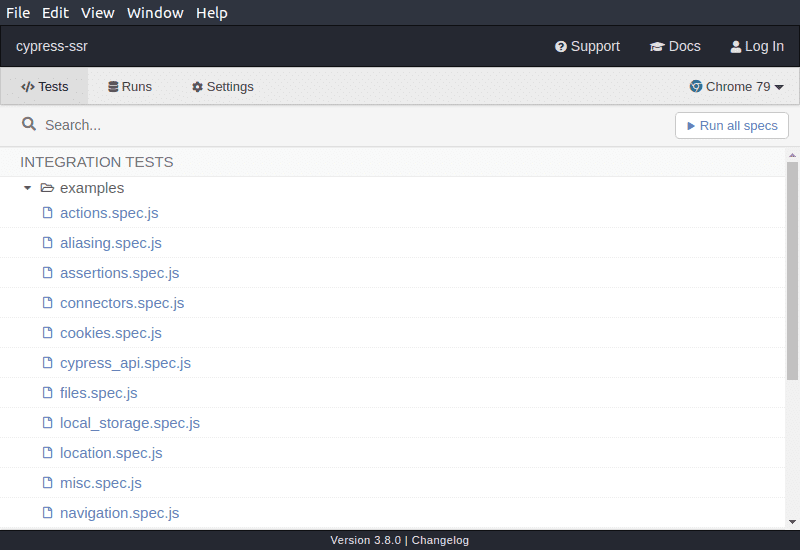
Before we move on you should verify your install by running cypress.
yarn cypress open
Writing you first test
In the root of the application Cypress will have created in cypress.json file. We will modify this file and add the following:
{
  "baseUrl": "http://localhost:3000"
}
This special JSON key will tell Cypress where we are running our application. We can now write our first spec.
Create a folder cypress/integration/next, the folder name doesn't matter, but cypress UI will organise our specs into collections using the folder structure.
In that folder we can put the following test.spec.js file:
context('Next App', () => {
  it('visit the home page', () => {
    cy.visit('/')

    cy.get('.hero')
      .contains('Welcome to Next.js!')
  })
})
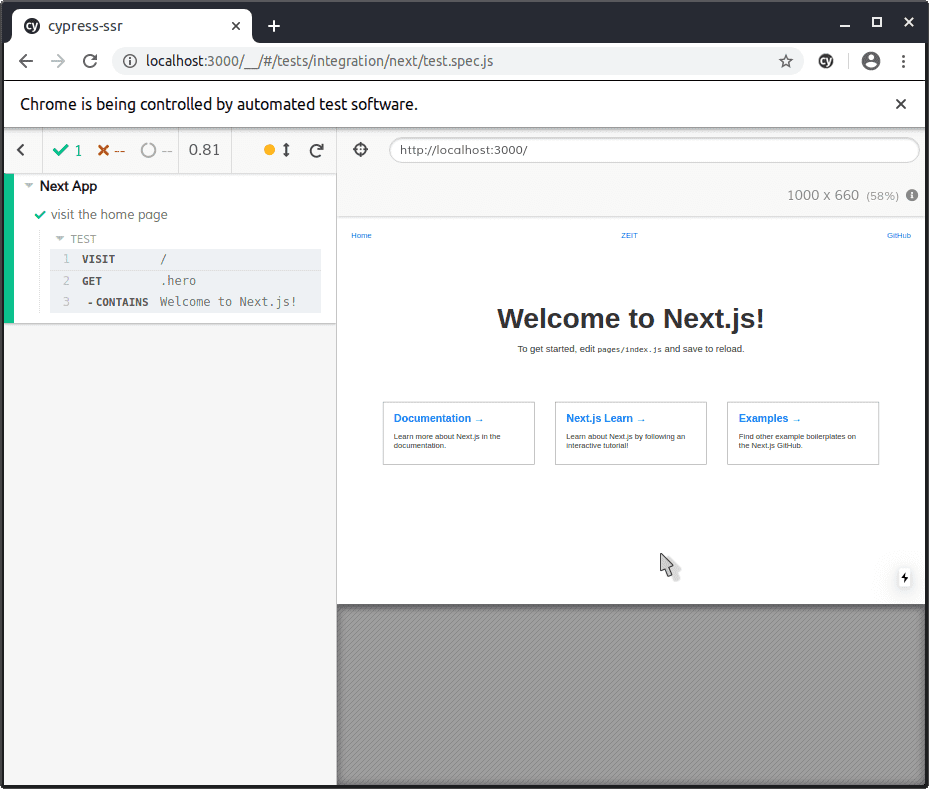
Now we can run this test from the Cypress UI. Start the Next JS development server with yarn dev and in a seperate terminal launch cypress with yarn cypress open.
Find and run our new test in the UI and you should get the below.

Server Side Testing
We are going to be learning a few new cypress concepts, so here is a run down:
Support Commands
Cypress allows you to create/register your own commands, into the test suite, just like adding shared functions. When Cypress starts it loads these commands into its global, so you can use them. The below is a command we want to use. It mimics navigating between pages server side, by removing all javascript.
// Request a page over http from the server and mount it in the DOM
//
// To simulate server side rendering remove all scripts so no window:onload
// events can occur and we can test server rendered views

Cypress.Commands.add('serverSideVisit', (url) => {
  cy.reload()
  cy.request(url).its('body').then((html) => {
    html = html.replace(/<script\b[^<]*(?:(?!<\/script>)<[^<]*)*<\/script>/gi, '')
    cy.state('document').write(html)
  })
  cy.get('script').should('not.exist')
})
My inspiration for this command comes from this blog https://glebbahmutov.com/blog/ssr-e2e/. So, now we have this command, we can paste it into cypress/support/commands.js and write a new test.
Update our cypress/integration/next/test.spec.js to be:
context('Next App', () => {
  it('visit the home page', () => {
    cy.visit('/')

    cy.get('.hero')
      .contains('Welcome to Next.js!')
  })

  it('visits the home page server side', () => {
    cy.serverSideVisit('/')

    cy.get('.hero')
      .contains('Welcome to Next.js!')
  })
})
And when you save it, if the development server and cypress are still booted, the spec will automatically re-run.
Closing
I hope you have enjoyed setting up Cypress and learning about how to use it for testing Client and Server Side Applications. Remember that when deciding to develop an isomorphic application, that testing its main beneficial feature, should be done at the earliest point.
Here are some useful Cypress resources for continuous delivery:
- Cypress documentation: https://docs.cypress.io/guides/overview/why-cypress.html#In-a-nutshell/
- Self hosted cypress parallel testing: https://github.com/agoldis/sorry-cypress
- Docker images with Cypress and browsers included for CI: https://github.com/cypress-io/cypress-docker-images/